When your baby wakes up hungry at 3am, the last thing you want is to spend extra time figuring out how to prepare a bottle. Finding the right feeding supplies, choosing the correct settings and waiting for the milk to warm can feel like a lot when you're already tired.
Learning how to use a bottle warmer at night involves more than simply switching it on. Choosing the correct warming mode, setting the milk volume and understanding warming times can help make overnight bottle preparation easier. With a little preparation before bedtime and the right settings, you can spend less time adjusting to the warmer and more time focusing on your baby.
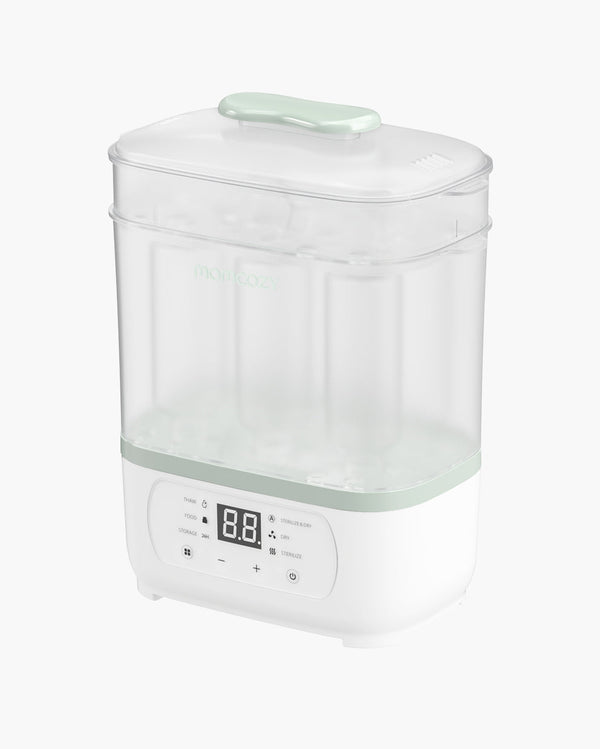
The Momcozy NightPro Baby Bottle Warmer is designed with night feeds in mind. It features water-bath warming, a soft night light, a transparent water chamber and memory settings to make bottle preparation more convenient. In this guide, we'll explain how to set it up, choose the right warming mode, estimate how long a bottle takes to warm and deal with temperature changes, along with practical advice for handling breast milk and formula safely.
Key Takeaways
- The NightPro uses water-bath warming and has settings for different bottle materials and milk starting temperatures.
- Warming time depends on the amount of milk, its starting temperature and the container you're using.
- Momcozy's UK product information gives reference times of around 3 minutes for 120 ml and 6–8 minutes for 240 ml.
- Select the correct material, warming mode and milk volume before starting a cycle.
- The 60-minute keep-warm countdown is an appliance feature, not a recommendation for storing warmed milk.
- Always check the milk temperature before feeding and follow NHS guidance for preparing and handling breast milk and formula.

Getting Started with the Momcozy NightPro Bottle Warmer
Before using your NightPro, place it on a flat, stable and dry surface near a suitable power socket. Keep it away from the edge of the worktop and make sure the cable is positioned safely out of your way.
Take a moment to familiarise yourself with the control panel. The warmer has settings for different container materials, milk volumes and warming modes. Understanding these controls before your first night feed can make the process easier when you're tired.
The transparent water chamber also lets you check the water level without having to guess. Always add water before starting a warming cycle, following the quantities in the Momcozy NightPro Baby Bottle Warmer User Manual.
How to Set Up the Bottle Warmer
- Place the warmer on a stable, level surface.
- Connect it to the power supply.
- Add the recommended amount of water to the chamber.
- Fit the bottle holder or bracket as directed in the instruction manual.
- Place one bottle or suitable container inside the warmer.
- Choose the appropriate settings for the container and milk.
Make sure the bottle sits securely in the chamber. Use only compatible containers and follow the manufacturer's instructions for the correct setup.
How Much Water Should You Add?
The amount of water needed depends on the volume of milk you're warming. The NightPro instruction guide provides the following reference amounts:
|
Milk volume |
Water amount |
|
2 oz |
90 ml |
|
3–4 oz |
120 ml |
|
5–6 oz |
200 ml |
|
7–11 oz |
240 ml |
For thawing milk in a bag, the manual specifies 240 ml of water.
These amounts are intended for the warmer's specified settings. Follow the instructions for your model rather than filling the chamber to an arbitrary level. Avoid switching on the appliance without sufficient water, as this can affect its operation and trigger an error warning.
How to Use the Momcozy NightPro Bottle Warmer
Once the warmer is set up, using it is straightforward. Choose the correct container material, milk volume and warming mode before starting the cycle.
Step 1: Add Water and Place the Bottle Inside
Add the recommended amount of water to the chamber according to the user manual. Then place your bottle or compatible container inside the warmer.
The NightPro is designed to warm one bottle or container at a time. Make sure it is positioned correctly and that the water level follows the manual's guidance.
Step 2: Select the Container Material
Choose the material setting that matches your bottle or container. The NightPro supports plastic, glass, silicone and milk bags.
Selecting the correct material helps the warmer use an appropriate heating cycle, as different containers transfer heat at different rates. Check the container label if you're unsure what it is made from.
Step 3: Choose the Milk Volume
Use the volume control to select the amount of milk in the bottle. Choosing the closest matching volume helps the warmer determine an appropriate heating cycle.
If your bottle uses a different measurement format, check the volume carefully before selecting the setting.
Step 4: Select a Warming Mode
Choose the mode that matches the milk's starting temperature or the type of food you want to warm. The NightPro offers five options: NORM, COLD, THAW, FOOD and 24H.
You can find a detailed explanation of each mode and when to use it in the next section.
Step 5: Adjust the Time if Needed
The control panel allows you to adjust the warming time in 30-second increments. Follow the manual's guidance when making adjustments for your selected mode.
Automatic start: The warmer starts automatically after 15 seconds without further input on the control panel. Check that your settings are correct before leaving the appliance to run.
Step 6: What to Do After Warming a Bottle
When the warming cycle finishes, the NightPro gives three beeps and begins a 60-minute keep-warm countdown.
Remove the bottle promptly and gently swirl the milk to distribute the temperature evenly. Check a few drops on the inside of your wrist before feeding. The milk should feel comfortably warm, not hot.
Always check the temperature before offering the bottle to your baby, as the contents may not have warmed evenly. Follow the recommended breast milk handling guidance for serving and storage, and use warmed milk promptly rather than leaving it at room temperature for an extended period.
Understanding the NightPro Warming Modes
Choosing the right mode helps you use the warmer according to the milk's starting temperature or the type of food you're preparing.
|
Mode |
What it's used for |
|
NORM |
Warming milk that starts at room temperature |
|
COLD |
Warming milk taken from the fridge |
|
THAW |
Defrosting frozen breast milk |
|
FOOD |
Warming complementary foods |
|
24H |
Scheduled preheating and temperature maintenance |
NORM Mode
Use NORM mode according to the starting temperature of the milk and the instructions for your selected setting. Select the appropriate material and volume settings before starting the cycle.
COLD Mode
COLD mode is intended for milk taken directly from the refrigerator. Since chilled milk starts at a lower temperature, it generally takes longer to warm than milk at room temperature.
THAW Mode
THAW mode is designed for defrosting frozen breast milk. Follow the manual's instructions for the water amount and compatible container.
Do not use frozen glass containers for thawing. The manual also advises against using glass containers in THAW mode.
FOOD Mode
FOOD mode is intended for warming complementary foods. Always check the food's temperature and stir it thoroughly before serving, as some areas may be warmer than others.
24H Mode
The 24H function allows scheduled preheating and temperature maintenance. The warmer heats the water to approximately 37–40°C and maintains it according to the selected settings.
Although this function can be convenient for certain warming routines, it should not be used to prepare powdered infant formula. NHS guidance on making up baby formula requires freshly boiled water to remain at least 70°C when it is mixed with formula powder. Water maintained at 37–40°C is not hot enough for this purpose.
Always follow the NHS instructions for preparing powdered formula safely.
How Long Does a Bottle Take to Warm?
Warming time depends on several factors, so there isn't one fixed time that applies to every bottle. The amount of milk, its starting temperature, the container material and the selected mode can all affect the result.
As a general reference, manufacturer examples indicate that 120 ml of refrigerated milk may take around three minutes to warm, while 240 ml may take approximately six to eight minutes. These are estimates rather than guaranteed timings.
Your actual warming time may differ depending on the bottle and the conditions of use. Check the milk before feeding instead of relying on the countdown alone.
What Affects Warming Time?
Milk volume: A larger amount of milk usually needs more time to warm than a smaller bottle.
Starting temperature: Milk taken straight from the fridge generally takes longer to warm than milk starting at room temperature.
Bottle material: Glass, plastic, silicone and milk bags transfer heat differently. This is why selecting the correct material setting is important.
Container shape and size: The shape of the bottle and how it sits inside the warmer can influence heat transfer. Make sure the container fits properly and is within the product's compatibility requirements.
Water level: The warmer uses water to transfer heat to the bottle. Adding the recommended amount helps the appliance work as intended.
How to Make Night Feeds Easier
A little preparation before bedtime can help make overnight feeding less stressful. You don't need a complicated routine; a few simple checks can save time when your baby wakes.

Prepare Your Feeding Area
Keep the items you regularly use within easy reach, such as clean bottles, teats, muslins and other feeding essentials. Make sure the warmer is set up safely and that its power cable won't become a trip hazard.
The NightPro's built-in night light can help you see the controls and water chamber without switching on a bright overhead light. It has two brightness levels, so you can choose the one that suits your room.
Check the Settings Before Starting
Take a moment to check the selected mode, container material and milk volume before starting the cycle. This is especially helpful during overnight feeds when it's easy to overlook a setting.
The memory function retains previous settings, which can make repeat use more convenient. However, always check that the saved settings are suitable for the next bottle rather than assuming they are correct.
Keep Feeding Safety in Mind
Preparing your feeding area in advance doesn't mean milk or formula should be left out for longer than recommended. Store expressed milk and prepared formula safely, and follow NHS guidance on handling, warming and storing breast milk and preparing formula.
For powdered formula, prepare each feed using freshly boiled water that has cooled for no more than 30 minutes, so it remains at least 70°C when mixed with the powder. Cool the prepared bottle before giving it to your baby.
What to Do After Warming a Bottle
Once the warming cycle has finished, remove the bottle and gently swirl it to distribute the heat. Avoid shaking breast milk vigorously.
Test a few drops on the inside of your wrist before feeding. The milk should feel comfortably warm, not hot. If it feels too warm, allow it to cool before offering it to your baby.
If the milk is not warm enough, the NightPro instructions explain that you can place the bottle back in the warm water for another 30–60 seconds without restarting the machine. Check the temperature again before feeding.
Do not leave a warmed bottle sitting in the warmer unnecessarily. Follow the appropriate guidance for the type of milk you're using.
Can Babies Drink Cold Breast Milk?
Yes. Expressed breast milk does not have to be warmed if your baby is happy to drink it cold. Some babies accept milk straight from the fridge, while others prefer it closer to body temperature.
If you choose to warm breast milk, use a bottle warmer or place the bottle in a jug of warm water. Avoid using a microwave or heating milk directly on the hob, as these methods can create hot spots and may damage some of the milk's components. Read the NHS guidance on expressing and storing breast milk for more information.
How Long Can Warmed Breast Milk Be Kept?
Follow NHS guidance on handling expressed breast milk when handling warmed breast milk. Once breast milk has been warmed, use it within one hour. Discard any milk left after your baby has finished feeding. Once your baby has finished feeding, discard any leftover breast milk. Do not save it for another feed.
Do not return leftover milk to the fridge for another feed.
Cleaning and Maintaining Your NightPro
Regular cleaning helps keep your bottle warmer in good working order. Before cleaning, switch off and unplug the appliance, then allow it to cool.
Wipe the exterior with a soft, damp cloth. Avoid immersing the main unit in water or allowing water to enter the electrical components.
The water chamber may develop limescale over time, particularly if you live in an area with hard water. Follow the manufacturer's descaling instructions, including the recommended cleaning solution and rinsing steps. Do not use abrasive cleaners or rough materials that could damage the surface.
Make sure the appliance is dry and properly maintained before using it again. For detailed cleaning instructions, refer to the Momcozy NightPro user manual.

Troubleshooting Common NightPro Issues
Even when you follow the instructions, you may occasionally encounter an issue. Checking the settings and water level is a useful first step.
The Milk Is Not Warm Enough
If the milk is still cooler than expected:
- Check that you selected the correct warming mode.
- Confirm that the material and volume settings match the bottle.
- Make sure the recommended amount of water was added.
- Check the milk temperature before deciding whether more warming is needed.
The manufacturer suggests placing the bottle back in the warm water for another 30–60 seconds if necessary. Check the temperature again before feeding.
The Warmer Shows an E3 Warning
An E3 warning can indicate that there is not enough water in the warmer for the selected operation.
Switch off the appliance and check the water level. Add the recommended amount of water according to the NightPro user manual before trying again. Do not continue operating the warmer without addressing the warning.
The Bottle Takes Longer to Warm Than Expected
A longer warming time does not necessarily mean the warmer is faulty. Check the milk volume, starting temperature and container material. Refrigerated milk and larger bottles generally need more time than smaller amounts of room-temperature milk.
Also check that the bottle is positioned correctly and that the water level follows the manual's instructions.
The Warmer Does Not Start
Check that the power connection is secure and that the appliance is switched on. Review your selected settings and make sure the water chamber has been filled correctly.
If the warmer still does not operate as expected, stop using it and consult the user manual or Momcozy customer support.

Frequently Asked Questions
Can I leave the bottle in the warmer overnight?
The NightPro has a 24H function for scheduled preheating and temperature maintenance, but this does not mean prepared milk or formula can be left in the warmer overnight. Follow the relevant food-safety guidance for storing and preparing your baby's feeds. Do not use water maintained at 37–40°C to prepare powdered formula.
Can I warm breast milk directly from the fridge?
Yes. Select COLD mode and choose the appropriate material and volume settings. The time required will depend on the amount of milk and the container you're using. Always check the temperature before feeding.
Can I use the NightPro with glass bottles?
The NightPro supports compatible glass containers for suitable warming modes. However, do not use frozen glass containers for thawing, and follow the Momcozy manual's guidance on which materials can be used with each mode.
Can I warm milk in a storage bag?
The NightPro supports compatible milk bags. Select the BAG material setting and follow the manual's instructions for the appropriate mode and water amount. Make sure the bag is suitable for warming and positioned securely.
Why does my bottle feel warmer on the outside than the milk inside?
The bottle and milk may not warm at exactly the same rate. After warming, gently swirl the milk to distribute the temperature evenly. Test a few drops on your wrist before feeding rather than judging the temperature from the outside of the bottle.
Can I use the NightPro to prepare a powdered formula?
The warmer can help warm water or a prepared bottle, but its 24H temperature-maintenance setting of approximately 37–40°C should not be used to mix powdered formula. NHS guidance on making up baby formula states that formula powder must be mixed with freshly boiled water that is still at least 70°C. Follow the NHS preparation instructions and the formula manufacturer's guidance.
Does breast milk need to be warmed before feeding?
No. Some babies are happy to drink expressed breast milk cold or at room temperature. If your baby prefers it warm, use a suitable warming method and check the temperature before feeding. The NHS guide to expressing and storing breast milk has further information.
Conclusion
Night feeds can be tiring, but having a simple bottle-preparation routine can make them a little easier. Once you understand how to use a bottle warmer at night, choosing the right settings and preparing your baby's bottle can become a more familiar part of your routine.
The Momcozy NightPro combines water-bath warming, material-specific settings, a visible countdown, memory functions and a gentle night light to make regular bottle preparation more convenient. Remember that warming time depends on the amount of milk, its starting temperature and the bottle material. Always check the milk before feeding, remove it promptly after warming and follow NHS guidance for safe preparation and handling.
Explore the Momcozy NightPro Baby Bottle Warmer to see whether its features suit your family's feeding routine.