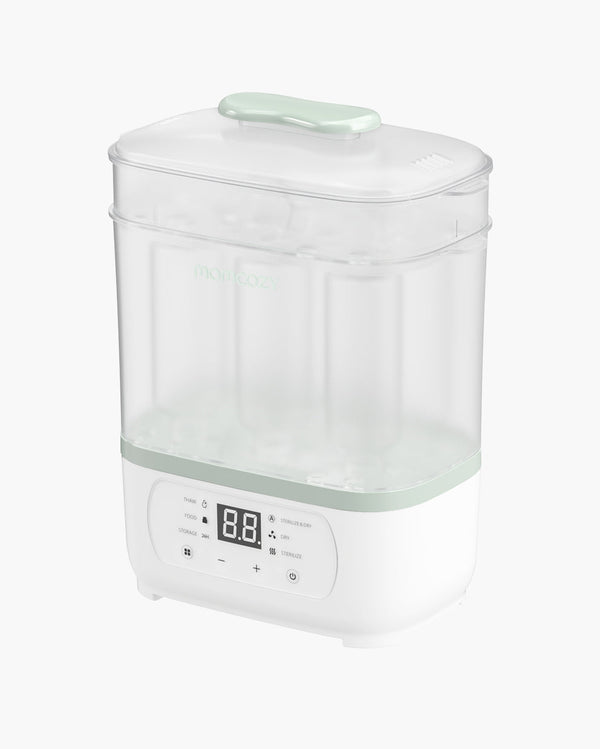
Night feeds are easier when your equipment is ready. The Momcozy Night Pro bottle warmer warms expressed breast milk and prepared formula, and it has a see-through water chamber, a night light, and settings it remembers for next time.
Here’s how to set it up, which mode to pick, and how to keep it clean, with NHS advice on preparing and warming feeds.
Getting Started: Unboxing and Initial Setup
Remove all the packaging, then disassemble and wash the parts before first use. Check that you have the warmer, the instruction booklet, and the quick start guide. Put the warmer on a flat, dry, stable surface near a plug socket, away from the cot, curious hands, and trailing cables.

Installing the Heating Plate Isolation Bracket
The removable bracket keeps the bottle away from the heating plate. Line up its transparent buckle with the unlock mark on the base, then turn it in the direction of the arrow until it locks. Make sure it’s fitted properly before you add a bottle.
Adding Water the Right Way
Add clean drinking water to the chamber before placing the bottle inside. Follow the water-level markings and the UK user manual to select the correct amount for your milk volume:
- 2 oz (about 59 ml): 90 ml of water
- 3 to 4 oz (about 90 to 120 ml): 120 ml of water
- 5 to 6 oz (about 150 to 180 ml): 200 ml of water
- 7 to 11 oz (about 200 to 325 ml): 240 ml of water
When thawing a milk bag, always add 240 ml, regardless of the size of the bag.
Because the chamber is clear, you can see the level at a glance. Too little water can trigger the E3 warning. Never let water overflow, and never touch the hot water or the heating plate while the warmer is running.
How to Use Momcozy Night Pro Baby Bottle Warmer: Step-by-Step Operation
Step 1: Prepare Your Bottle
Use a clean bottle and milk that has been stored properly. For young babies, follow the NHS guidance on cleaning and sterilising feeding equipment. Close the bottle tightly and stand it upright in the water-filled chamber. The warmer fits bottles and milk bags up to 82 mm in diameter, and takes one bottle at a time.
Check the storage date on expressed milk. If you’re using formula, remember that making up powdered formula and warming formula that’s already prepared are two different things.

Step 2: Power On
Plug in the warmer. The power button glows green in standby. Press it once to open the working screen, where the display, night light, and buttons all light up. If you don’t touch anything for 30 seconds, it drops back to standby, and it switches itself off after 3 minutes in standby. The LIGHT button switches the night light between two brightness levels.
Step 3: Select Bottle Material
Press M to choose your container:
- PLASTIC: plastic bottle
- GLASS: glass bottle
- BAG: milk storage bag
- SILICA: silicone bottle
Select the material that matches your bottle or milk storage bag, following the instructions for your model.
Step 4: Choose Your Warming Mode
Pick the mode that matches where your milk is starting from:
- NORM: for milk at room temperature that needs gentle warming. Only use milk that has been handled and stored safely.
- COLD: for chilled breast milk or prepared formula straight from the fridge. Warming time depends on the volume, the bottle material, and the starting temperature.
- THAW: for frozen breast milk in a bottle or bag. Glass isn’t recommended in this mode, and you should never heat a frozen glass container because it can break. The NHS recommends defrosting breast milk in the fridge where you can, and never refreezing it once thawed.
- FOOD: for suitable prepared baby food in a food container. Stir well and check for hot spots before serving.
- 24H: This mode maintains the water at 37–40°C for a selected period of up to 24 hours. It can also gently pre-warm the contents of a compatible bottle, milk storage bag or food container through water-bath heating. Always follow the recommended heating and feeding guidance for the contents.
Important: The 37–40°C water temperature is not suitable for preparing powdered infant formula under NHS guidance, which requires water at a temperature of at least 70°C when mixing formula. Do not use this mode as a substitute for safe milk preparation or storage.
To save time at night, have clean, sterilised equipment ready and keep expressed milk in the fridge until you need it. Don’t leave milk out at room temperature while you wait for your baby to wake.
Step 5: Set Milk Volume
Press the OZ button to choose the bottle size. The display shows ounces, and the range is 2 to 11 oz (about 59 to 325 ml).
Step 6: Start Warming
Press the power button to begin and watch the countdown. If you don’t press it, the warmer starts by itself after 15 seconds.
Never leave the warmer running unattended, and keep the cable and hot water out of children’s reach.
After Warming: Important Steps
When the warming cycle ends, the Night Pro beeps three times and automatically begins a 60-minute keep-warm countdown. For best results, remove the bottle promptly after the completion alert.
Gently swirl the milk to distribute the warmth, then test a few drops on the inside of your wrist. It should feel lukewarm or cool, never hot. Milk does not need to reach exactly 37°C before feeding.
If the milk is not warm enough, check the selected settings and refer to the troubleshooting guidance below.
Important: The 60-minute keep-warm countdown is an appliance feature, not a recommended milk storage time. Feed your baby promptly after warming and discard any milk left over after feeding. Never use a microwave to warm breast milk or formula, as uneven heating can create hot spots that may burn your baby’s mouth.

Why Choose Momcozy Night Pro Baby Bottle Warmer
No More Button Pressing at 3 AM
The warmer remembers your last settings, so you won’t need to reselect the material, mode, and volume each time. After swapping in a new bottle, press the power button twice to start a fresh cycle. Give the display a quick check before you begin.
A Softer Light for Night Feeds
The two-level night light helps you check the controls and water level without switching on a bright overhead light. It offers a more convenient way to see what you’re doing during night feeds.

Choose the Right Settings for Warming
Choose a setting that matches the starting temperature, container material and milk volume, following the product instructions. Always check the milk’s temperature before feeding rather than relying on the selected setting alone.
See What You're Doing (Even in the Dark)
The transparent chamber makes the water level easy to see and shows limescale that needs cleaning. If you’re still deciding whether this type of appliance suits your routine, our guide on whether you really need a bottle warmer can help.
Simple Daily Cleaning and Maintenance
Unplug the warmer and let it cool fully. Pour out the remaining water, release the isolation bracket, then wipe the chamber and removable parts. Clean all parts after every use. Avoid abrasive cleaners and sharp tools, which can damage the surfaces.
If you live in a hard-water area, limescale can build up around the heating plate and affect performance. A quick wipe takes minutes, but a full descale takes longer.
Troubleshooting Common Issues
E3 error: The chamber probably needs more water. Switch off, let the warmer cool if necessary, add water to the marked level, and restart.
Milk too hot: Check the material, volume, and mode. Take the bottle out when the cycle finishes, and press - to shorten the time next cycle. Never offer milk that feels hot on your wrist.
Milk not warm enough: Check that you added the water before the bottle, then check the material and mode. Return the bottle to the warm water for 30 to 60 seconds, and press + next cycle to add time. Test again before feeding.
Buttons not responding: Dry your hands and wipe any moisture off the panel. Check the plug and socket. If the problem continues, check the manual or contact Momcozy support rather than opening the appliance.
FAQ
Does a baby bottle need to be 37°C?
No. Babies can take breast milk cold, and it doesn’t need to reach an exact temperature. If you warm a feed, test a few drops on your inner wrist. It should feel lukewarm or cool, not hot.
Can you put formula milk in a bottle warmer?
Yes, you can warm formula that’s already prepared. First, make it up following the NHS instructions, including water of at least 70°C for powdered formula. The 24H setting can’t replace that step. Throw away any formula left after a feed.
How much water should I put in the Momcozy Night Pro?
Use 90 to 240 ml, depending on how much milk is in the bottle: 90 ml for 2 oz, 120 ml for 3 to 4 oz, 200 ml for 5 to 6 oz, and 240 ml for 7 to 11 oz. For a frozen milk bag, use 240 ml.
How long can expressed breast milk stay in a bottle warmer?
Don’t leave it in there. The keep-warm countdown isn’t a safe storage time, so take warmed milk out and feed promptly, then throw away what’s left. Ask your midwife or health visitor about thawed milk or babies in neonatal care.
How can I prepare for night feeds safely?
Before bed, set out clean, sterilised equipment and keep expressed milk in the fridge. Place the warmer out of your baby’s reach. For powdered formula, make up a fresh feed when needed rather than mixing ahead with lukewarm water.
Can I warm expressed breast milk straight from the fridge?
Yes. Choose COLD with a compatible container, swirl, and test the temperature before feeding. If your baby is happy to drink it chilled, you don’t need to warm it.
Start Warming Smarter Tonight With the Night Pro
Knowing which setting to use, how to prepare milk, and how to store it safely can feel like a lot at 3 am. With its visible water chamber, adjustable night light, and saved settings, the Momcozy Night Pro is designed to support your routine so you can focus on your baby. Browse our full range of baby bottle warmers.
*This guide provides general product-use and feeding information. For individual feeding concerns, speak to your midwife, health visitor, or another qualified healthcare professional.